
Isn't it cute, though?
We're not done with it, yet, but this will be the "tool shed" for any outdoors-compatible stuff that I'll need to store during my tiny house life. Bike pump, extra hoses and extension cords, a few tools, who knows.
As you can see, it has the same roof profile as the main house, but sloped in the opposite direction. Just a style thing. For aesthetics, the tool shed could have been taller than I built it, to be a completely scale model of the house; however, when I held up sticks to imagine that size of shed, I realized it would be humungous from a practical standpoint. At the size it is, I can easily reach anything in it from the ground without having to perch on the trailer tongue or something. It's about 4' tall at the tall side and 3' tall at the short side, and is about 4' wide.
Many tiny houses have a small structure attached to them like this. I've noticed that hardly any of the blogs really go into detail about how they built and attached them, though. I created an initial plan, which Dad helped me pare down--I'd totally overbuilt it as a lumber box, whereas he has more faith in the power of plywood. I've been reading up on cabinetry lately, so I should have known you can get away with a lot of reliance on sheet goods!
The biggest sticking point was: how do you attach a weight-bearing structure to a SIP wall? The bolts-under-the-Tyvek idea wasn't going to work here, because clearly the tool shed is on the outside of the house. And I hadn't planned for it. And bolts are big and intrusive and I don't love having them sticking into my living space.
Instead, I remembered those crazy bad-ass SIP screws that are playing such an important role--at 24" on center, no less!--in holding my house together. They hadn't come with any packaging or labeling whatsoever, though. What the heck were they?!
 A
bit of searching online and I discovered FastenMaster, a structural
screw manufacturer. Most screws, please note, are not structural. You
can't expect a normal screw to hold much weight perpendicular to itself
without snapping; it's pull-out strength, not shear strength, where
screws excel.
A
bit of searching online and I discovered FastenMaster, a structural
screw manufacturer. Most screws, please note, are not structural. You
can't expect a normal screw to hold much weight perpendicular to itself
without snapping; it's pull-out strength, not shear strength, where
screws excel.Normal screws, anyway. FastenMaster doesn't make normal screws. They make, for example, these 6" pancake-head "HeadLok" screws which are almost exactly like the SIP screws I used before. In fact, SIPs are one of the recommended uses for them listed on the package. The big, wide head means that they can't pull through the OSB or anything, and they're designed to be a replacement for a bolt--that is, they're designed for shear strength (and sheer strength, for that matter...).
 They had the shear strength values listed on the package, but the
numbers didn't have units, so I didn't particularly "engineer" the shed
so much as... guessed.
They had the shear strength values listed on the package, but the
numbers didn't have units, so I didn't particularly "engineer" the shed
so much as... guessed. The part of the shed that interfaces with the house is made of 2x4s. I attached these one by one to the wall using the HeadLok screws on 9-12" centers, driven from the inside out.
To the right: the first piece (we eventually removed that piece that's sticking out perpendicular).
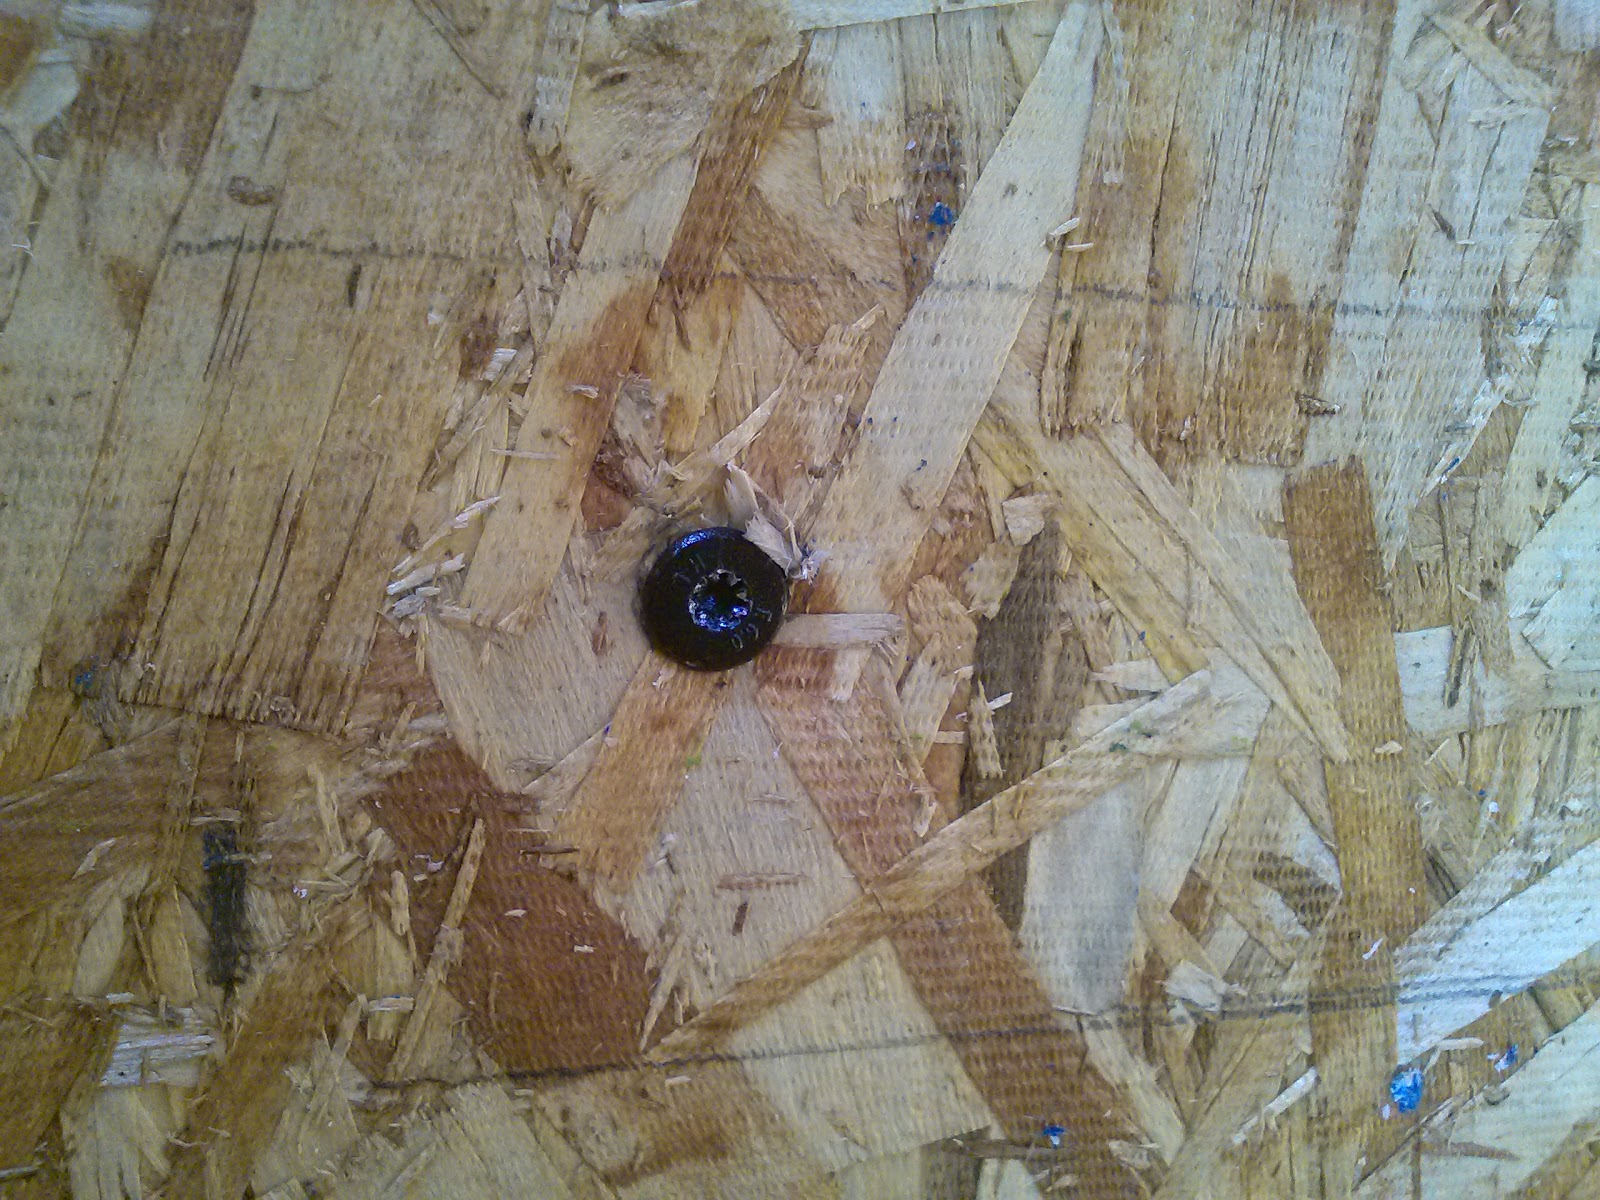 Here's the HeadLok screw in action. It has what FastenMaster, at least, calls a "spider drive": an 8-pointed star-shaped screw drive that neither Dad nor I had ever seen before. It's supposed to
help prevent cam-out, where your screwdriver bit slips out of the slot
in the screw (i.e. the screw drive) and at best taxes your patience, and at worst wrecks the bit or the drive and prevents you from either driving the screw in or pulling it out to start over...
Here's the HeadLok screw in action. It has what FastenMaster, at least, calls a "spider drive": an 8-pointed star-shaped screw drive that neither Dad nor I had ever seen before. It's supposed to
help prevent cam-out, where your screwdriver bit slips out of the slot
in the screw (i.e. the screw drive) and at best taxes your patience, and at worst wrecks the bit or the drive and prevents you from either driving the screw in or pulling it out to start over...I didn't have any cam-out issues, but then, I was using my trusty impact driver, so I don't usually have them anyway. I love my impact driver!
 Instead of cutting birdsmouths in the rafters
for the shed, we just cut the appropriate angle in the vertical pieces
and left the rafter intact. The rafter that's against the wall was
screwed in with HeadLok screws, too, so we're not concerned about it
slipping off, or anything untoward of that nature.
Instead of cutting birdsmouths in the rafters
for the shed, we just cut the appropriate angle in the vertical pieces
and left the rafter intact. The rafter that's against the wall was
screwed in with HeadLok screws, too, so we're not concerned about it
slipping off, or anything untoward of that nature. We wanted to protect the Tyvek and create a better-looking back of the
shed. I wanted to also ensure that if--heaven forbid--any water made its
way behind the shed, it would have a chance to evaporate.
We wanted to protect the Tyvek and create a better-looking back of the
shed. I wanted to also ensure that if--heaven forbid--any water made its
way behind the shed, it would have a chance to evaporate.I used some scrap 3/8" plywood to create a little rainscreen system...

...And then used some more plywood scraps to create a paneled back wall.
The whole house will utilize this "rainscreen wall" idea. The idea is to provide a capillary break and air circulation behind the siding, so that any water that gets behind there doesn't get trapped or drawn further up behind the siding via capillary action.

Then we added the rafter, a front piece of "floor" framing, another piece of scrap 1/2" plywood floor sheathing, and started sheathing the sides.
As Dad impressed upon me, you can rely a lot on the sheathing for structural integrity.

We started using the shed for "storage" immediately. Just one more surface to put something down on and forget about it... which is definitely my #1 bad construction habit!

We ripped a piece of 2x4 in half and used those halves for the front vertical pieces, to attach the plywood and to support the other rafter.
Finally, we sheathed the roof and I used a bit of roofing felt to get it ready for the metal roof that I'll add once I'm done installing the house's roof.
We screwed and glued everything, although the sheathing was attached mainly with 1 1/4" staples and glue, with just a few reinforcing screws.

Ta-da!
I still haven't decided about interior shelving, and I'm not sure yet how the front and door are going to go together. Dad suggested having a door that flips down and can be used as a light work surface. I think it's a cool idea, though with the trailer tongue there, I'm not sure how useful it would be. I'll keep thinking about it.
No comments:
Post a Comment