
The thing is, though, even the first window wasn't difficult to install, per se. We did it wrong, is all: we used too-short nails and forgot to create a gap for sealant along the bottom.
Two lessons learned. But the main one is Lesson 50: Communicate constantly with your work partner--don't assume they know exactly what you think should be happening at a given moment, and double-check that you are both following all the steps correctly. Just keep up a constant patter of checking and double checking and one of you, at least, should catch when you're going wrong!
On the second day of window installation, we got the two kitchen windows installed. Those are the vertically oriented single-hung windows on the tall side of the house. And we learned just how wrong you can go when you let that patter of checking and double-checking lapse...
We installed one of the windows inside out.
We'd been having a tough time up on the roof trying to get the sheathing square and ready for the fascia boards, so we decided to come down and install a couple windows. We were hot and frustrated and it would be more comfortable down on the ground. Besides, installing windows isn't so hard.
Uninstalling a window is considerably harder. Lesson 51: When you need a break, take an actual break!
Luckily, we only got halfway through the installation before I realized what we'd done; most of the nails were in, but at least we hadn't put the flashing tape over the nailing fins. (That stuff is almost impossible to remove; we'd have had to cut out the Tyvek there and reinstall it, too.) Dad drilled out the nails, I scrubbed the half-set silicone caulk off, and we reinstalled it right-side out.
On the third day of window installation, we finally had the hang of it. Four windows, zero foul-ups!
So how do you install a window? Here's how I did it:
 |
| Window hole cut in house wrap |
 |
| Flashing on the bottom of the window opening. |
 |
| Chiseling out the curved corners |
4. I also made sure to test-fit every window before committing. As it turns out, the curved corners of the SIP window openings did not allow the windows to comfortably fit, and if we forced them, the corners of the windows would rip the window flashing tape. We chiseled out those curved corners to give the window more room, and knocked off any drops of adhesive from the SIP installation that might get in the way. We also used a rasp to smooth the corners of the windows themselves, so they wouldn't catch and tear the flashing tape.
5. I applied a 3/8" bead of silicone window caulking around the top and sides of the window opening, where the window's nailing fins would lie. I did not apply caulking to the bottom; any water that gets in behind the window needs to be able to drain out.
 |
| Level and shims. Sadly, this was the inside-out window... :-( |
 |
| Nails hammered into the nailing fin |

First, two pieces of tape (...+8") along the window's sides that extended 3-4" above and below the window.


Ta da!
Later, when the door is installed, we'll go around with a can of low-expansion spray foam and fill in all those gaps around the windows from the inside. I think we can cut off the folded-in flaps of Tyvek now, too.
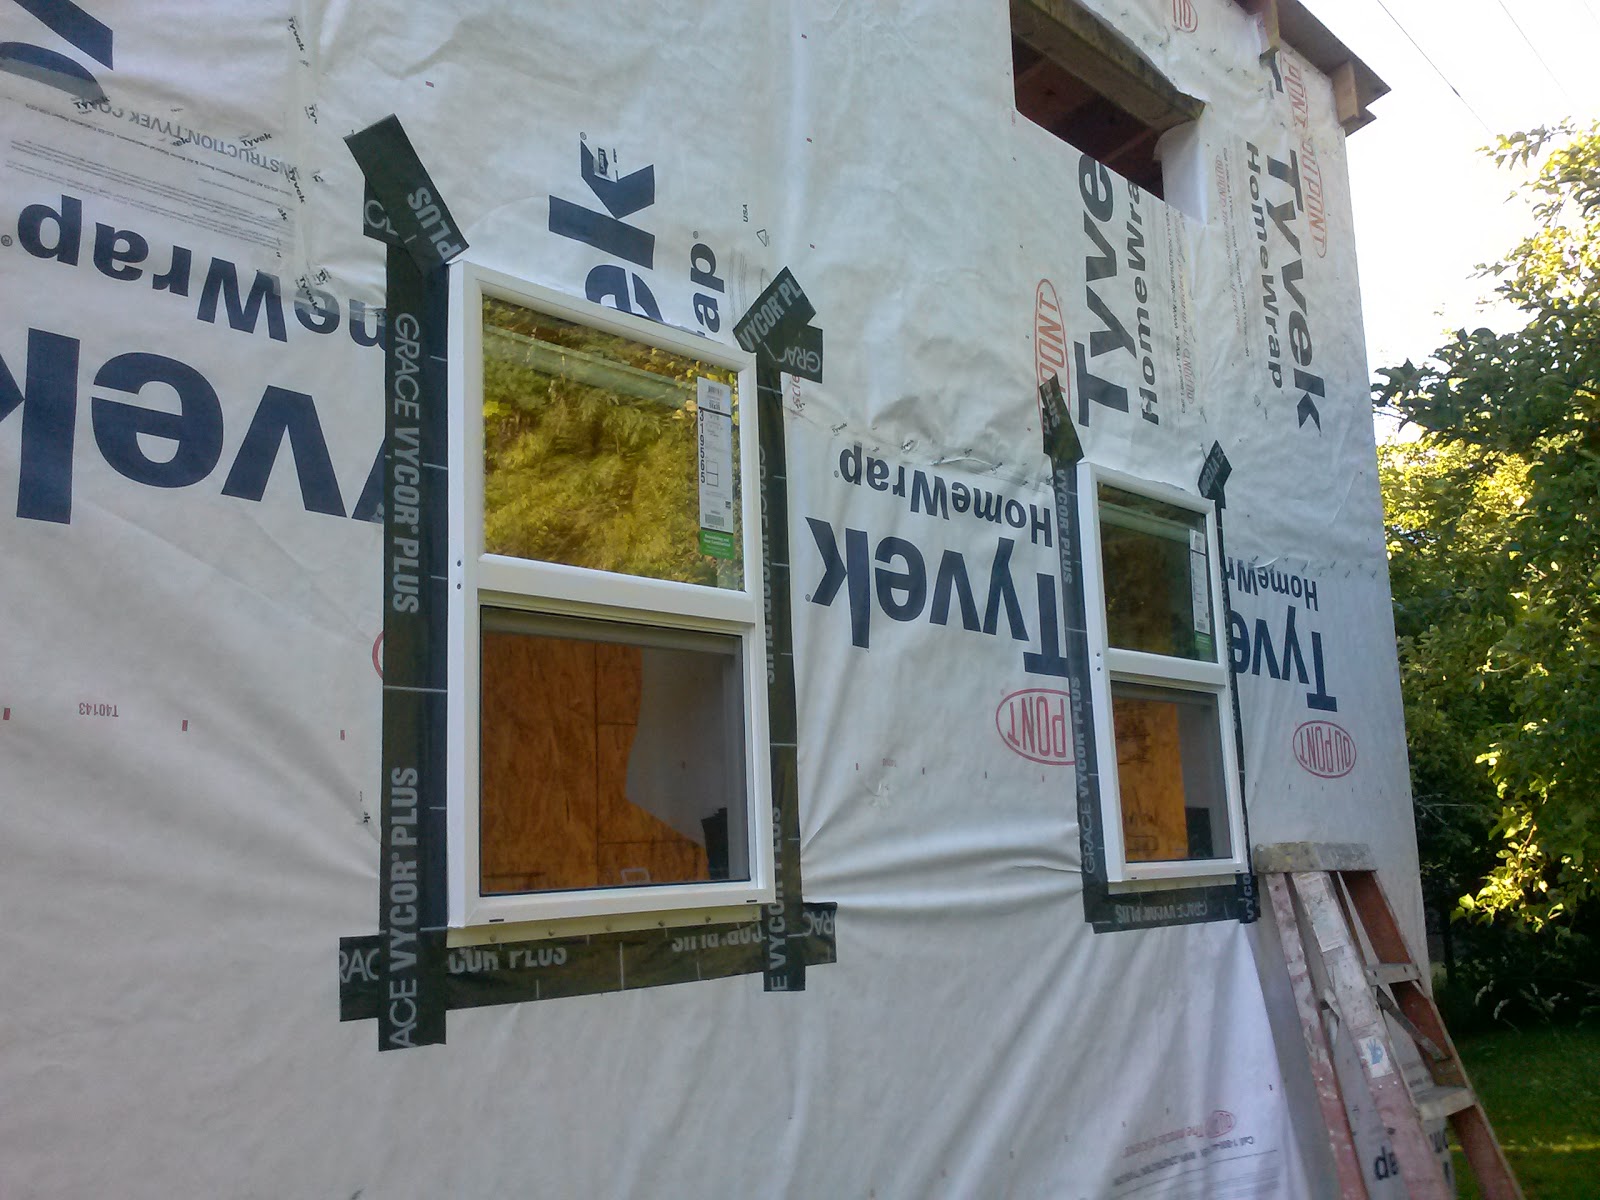 |
| Can't even tell which one was the epic reinstallation struggle... |
 |
| Bedroom window |
I'm happy that my windows are in, and Dad's happy that my windows aren't in his shop anymore. It's a win!
We are still struggling with getting the roof ready for the fascia, verge rafters, and soffits. We need to install those things (well, mainly the fascia and verge rafters), the Ice and Water Shield roof membrane, and the door before the house will be officially dried in. There are rain showers forecast for Thursday, so we need to get a move on!
Did you get the roof bits done before the (potential) rain today?
ReplyDeleteYour house is going to be so nice and bright with all of those windows!